This post may contain affiliate links. Please read our disclosure policy.

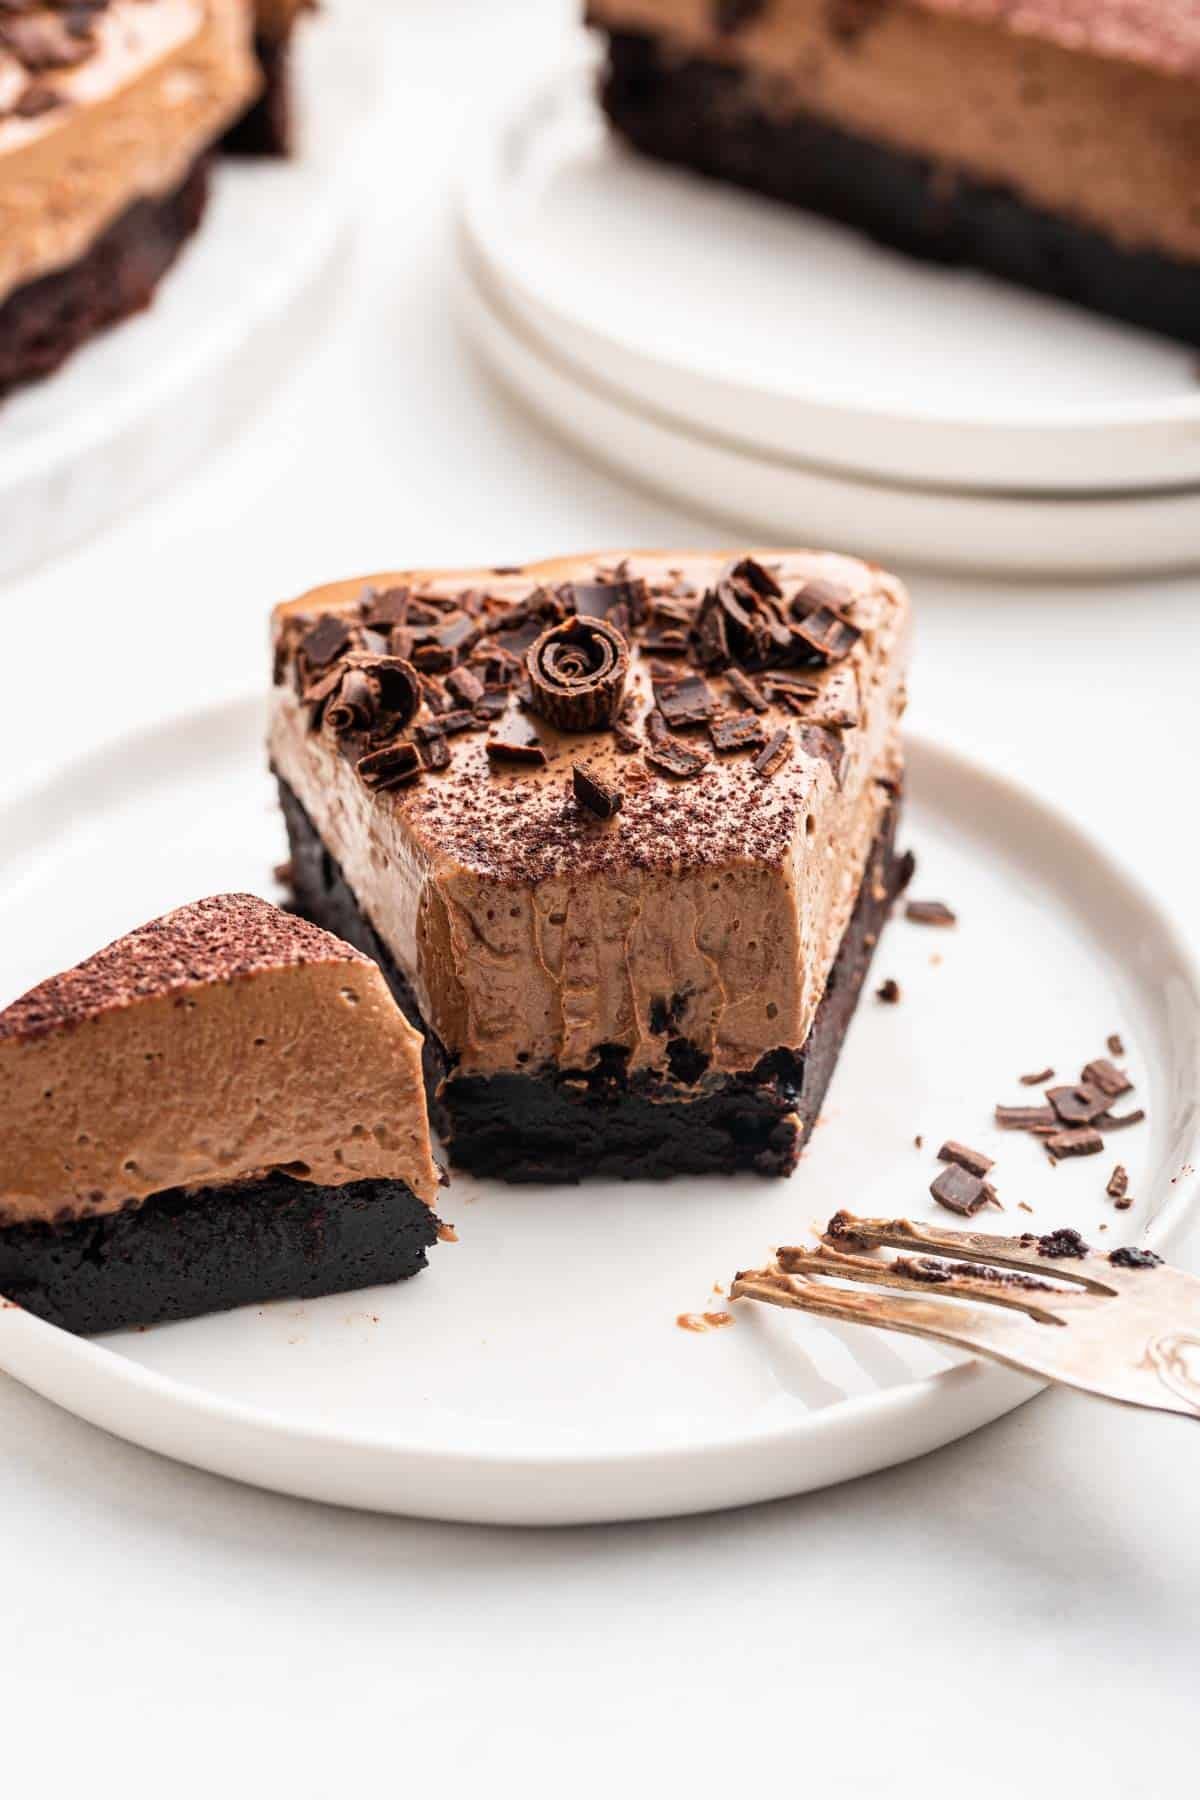
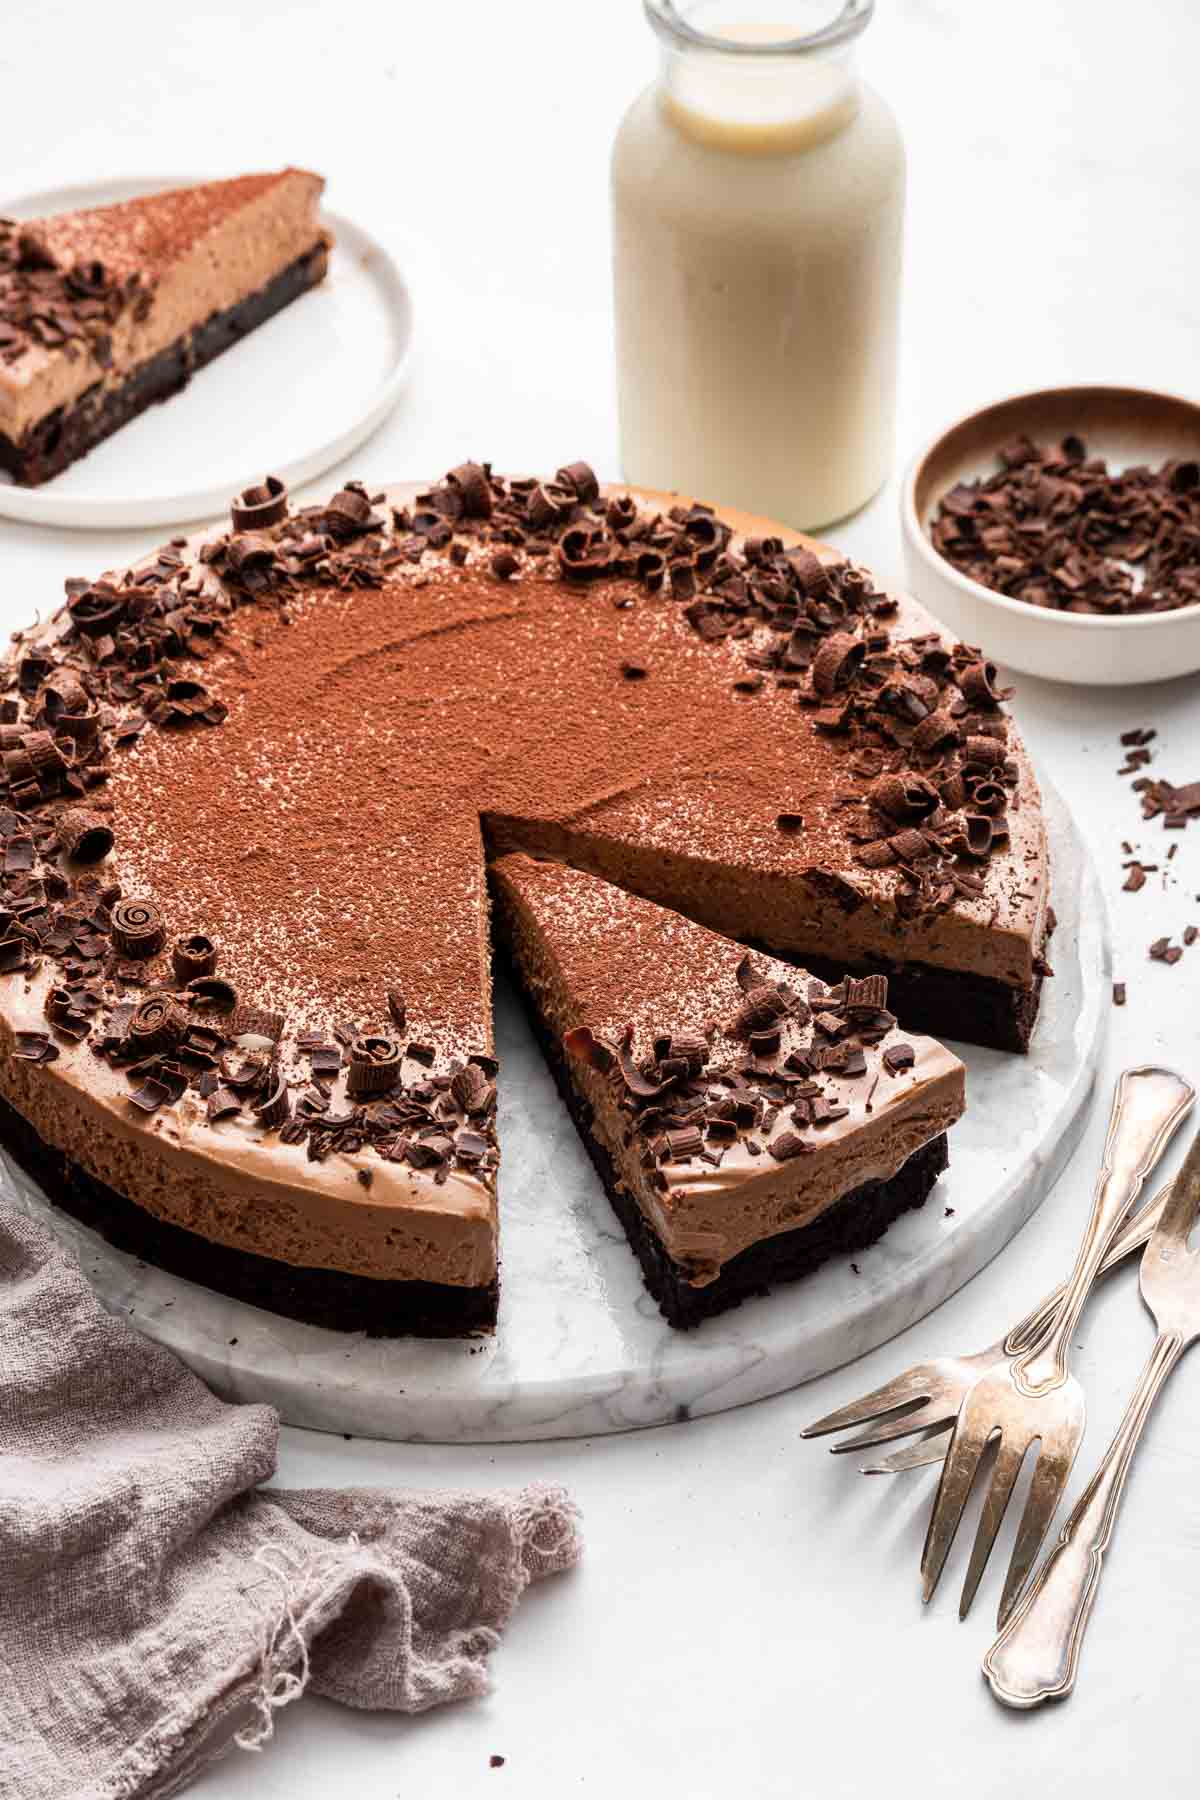
For those looking for the absolute best chocolate dessert ever, you are in the right place! This rich Chocolate Mousse Cake has a brownie bottom and a light, fluffy mousse topping. Plus, it only requires 8 ingredients!
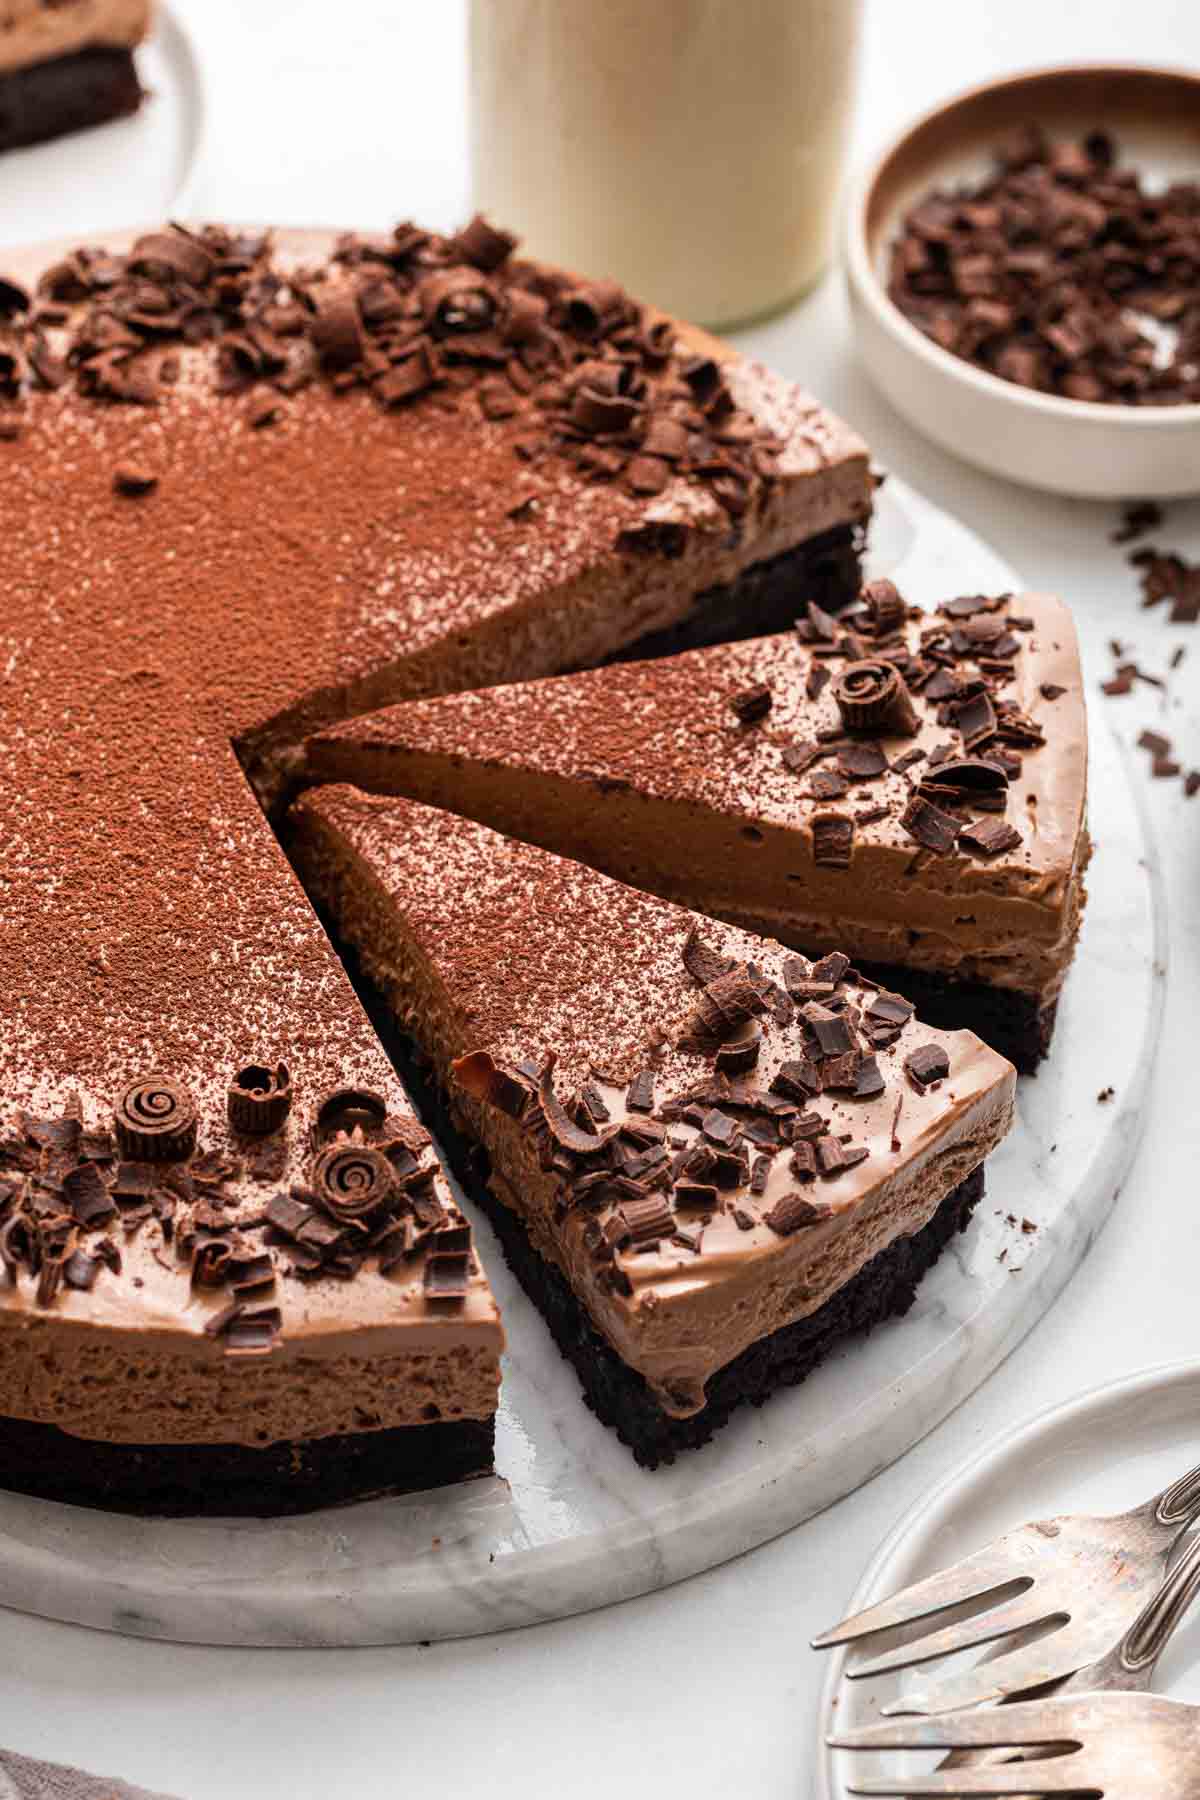
This is the Best Chocolate Mousse Cake Recipe EVER!
Since we live the small batch life (meaning, I create small desserts and small dinner for two recipes), I created a small batch version of this recipe for a 6-inch springform pan first.
However, I loved it so much so I scaled it up for a regular 9-inch springform pan, too! I will put both versions in the recipe card below.
If you’re one of those people that worries about consuming raw eggs in typical chocolate mousse, this recipe uses a fully cooked egg!
It feels a little like Valentine’s Day today with this chocolate mousse cake for two, but it’s not! It’s just an everyday dessert, made a little fancy with mousse on top.
I reworked my brownies for two recipe to bake them in a springform pan with the goal of piling fluffy chocolate mousse on top.
Easy Chocolate Mousse Cake Ingredients
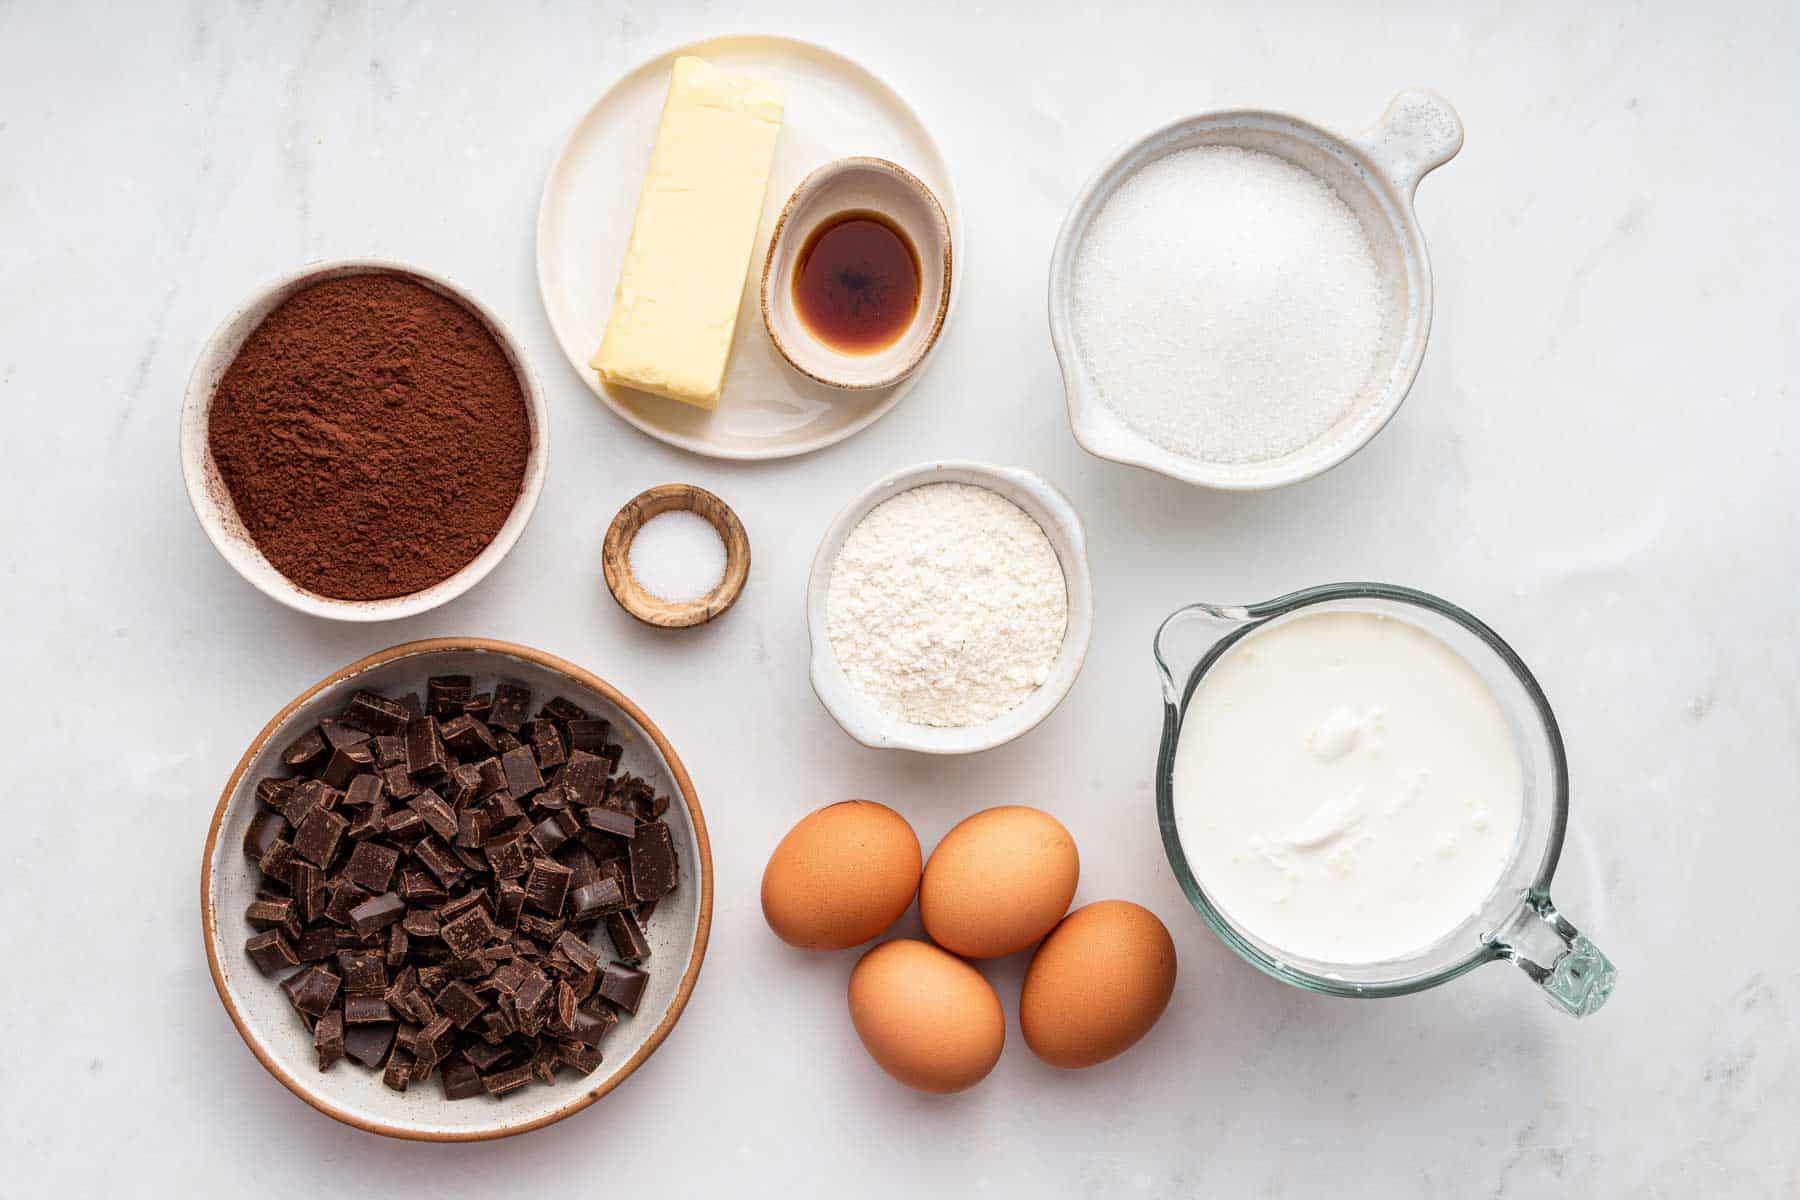
- Butter. For the bottom brownie layer, we need one stick of unsalted butter (no need to soften the butter, it can be cold from the fridge).
- Sugar. We need sugar for the brownie bottom layer and extra sugar for the mousse on top.
- Cocoa Powder. Unsweetened, natural cocoa powder.
- Vanilla Extract. Use real vanilla extract to enhance the flavor of chocolate. You’ll use it twice: one for the bottom layer and once for the top layer.
- Eggs. We need eggs for the brownie bottom layer and eggs for the mousse.
- Flour. A very small amount of flour to make the brownie on the bottom.
- Heavy Whipping Cream. Ensure the label says ‘heavy whipped cream,’ also called ‘double cream.’
- Semisweet Chocolate. While the brownie layer uses cocoa powder, the mousse uses melted chocolate. I recommend semisweet or bittersweet chocolate so that the final dessert isn’t overly sweet.
How to Make Chocolate Mousse Cake
Preheat the oven to 325 and spray a 9” round springform pan with cooking spray.
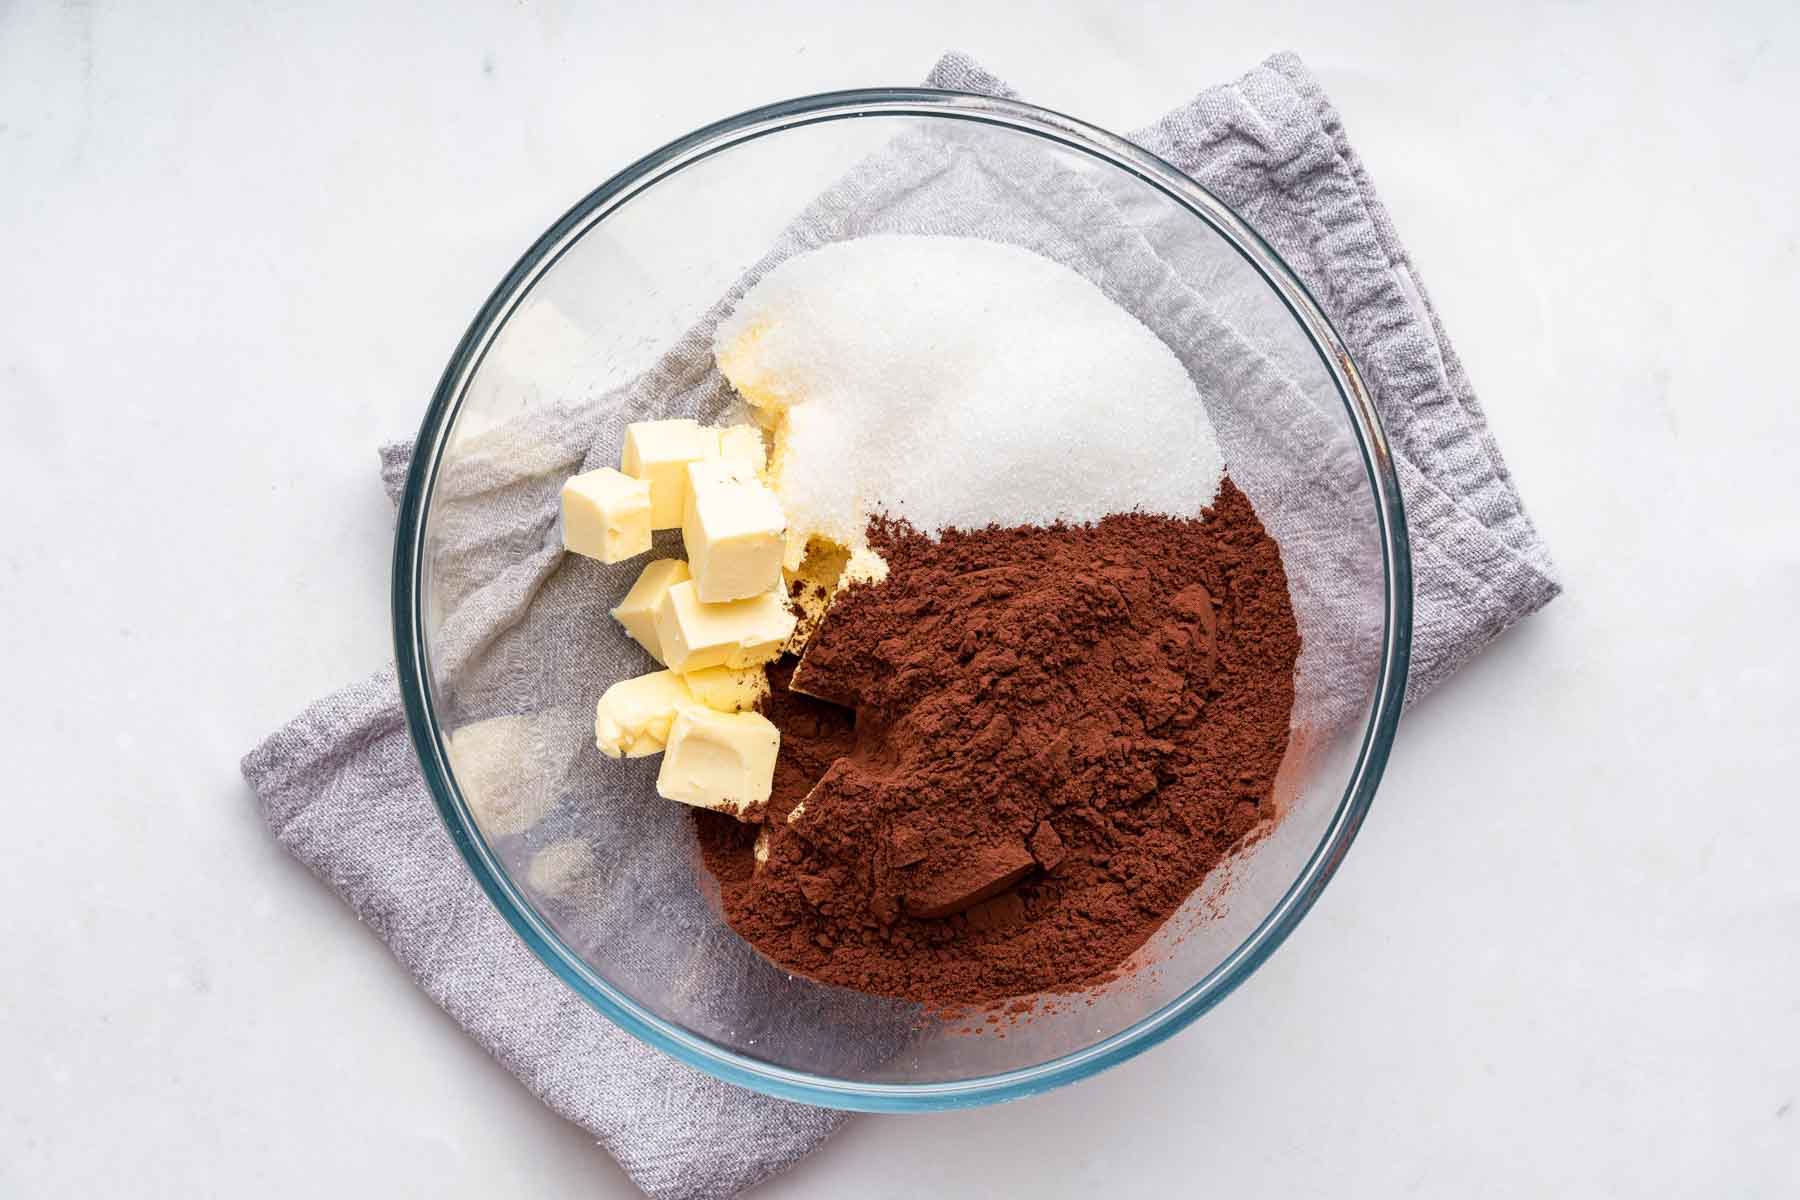
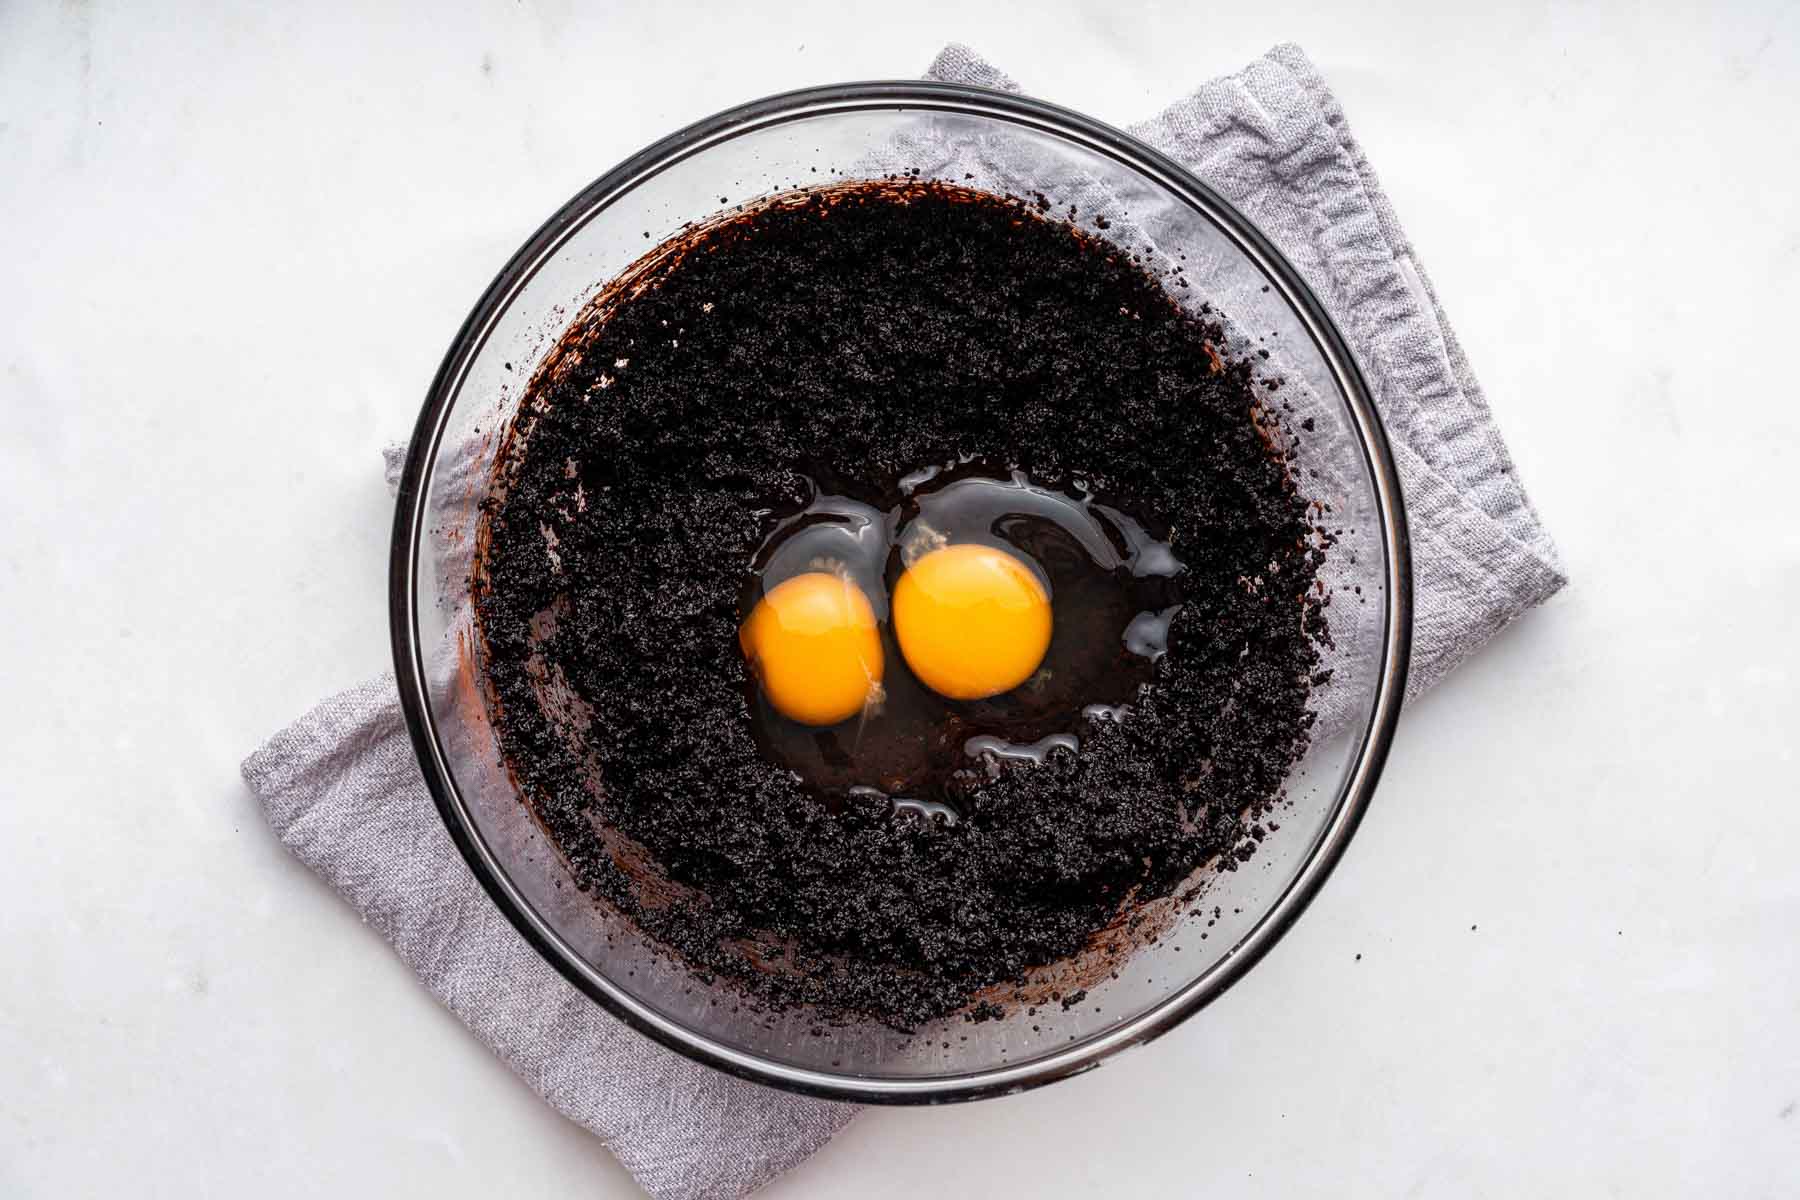
In a microwave-safe bowl, add the butter (cut into equal pieces), sugar and cocoa powder. Microwave on HIGH for 30 seconds, and then stop, stir, and microwave for an additional 30 seconds.
Then, stir in the salt and vanilla. Stir the mixture for a few minutes to cool off the butter. Then, add the eggs and stir very well to combine. Finally, sprinkle the flour on top, and then stir well.
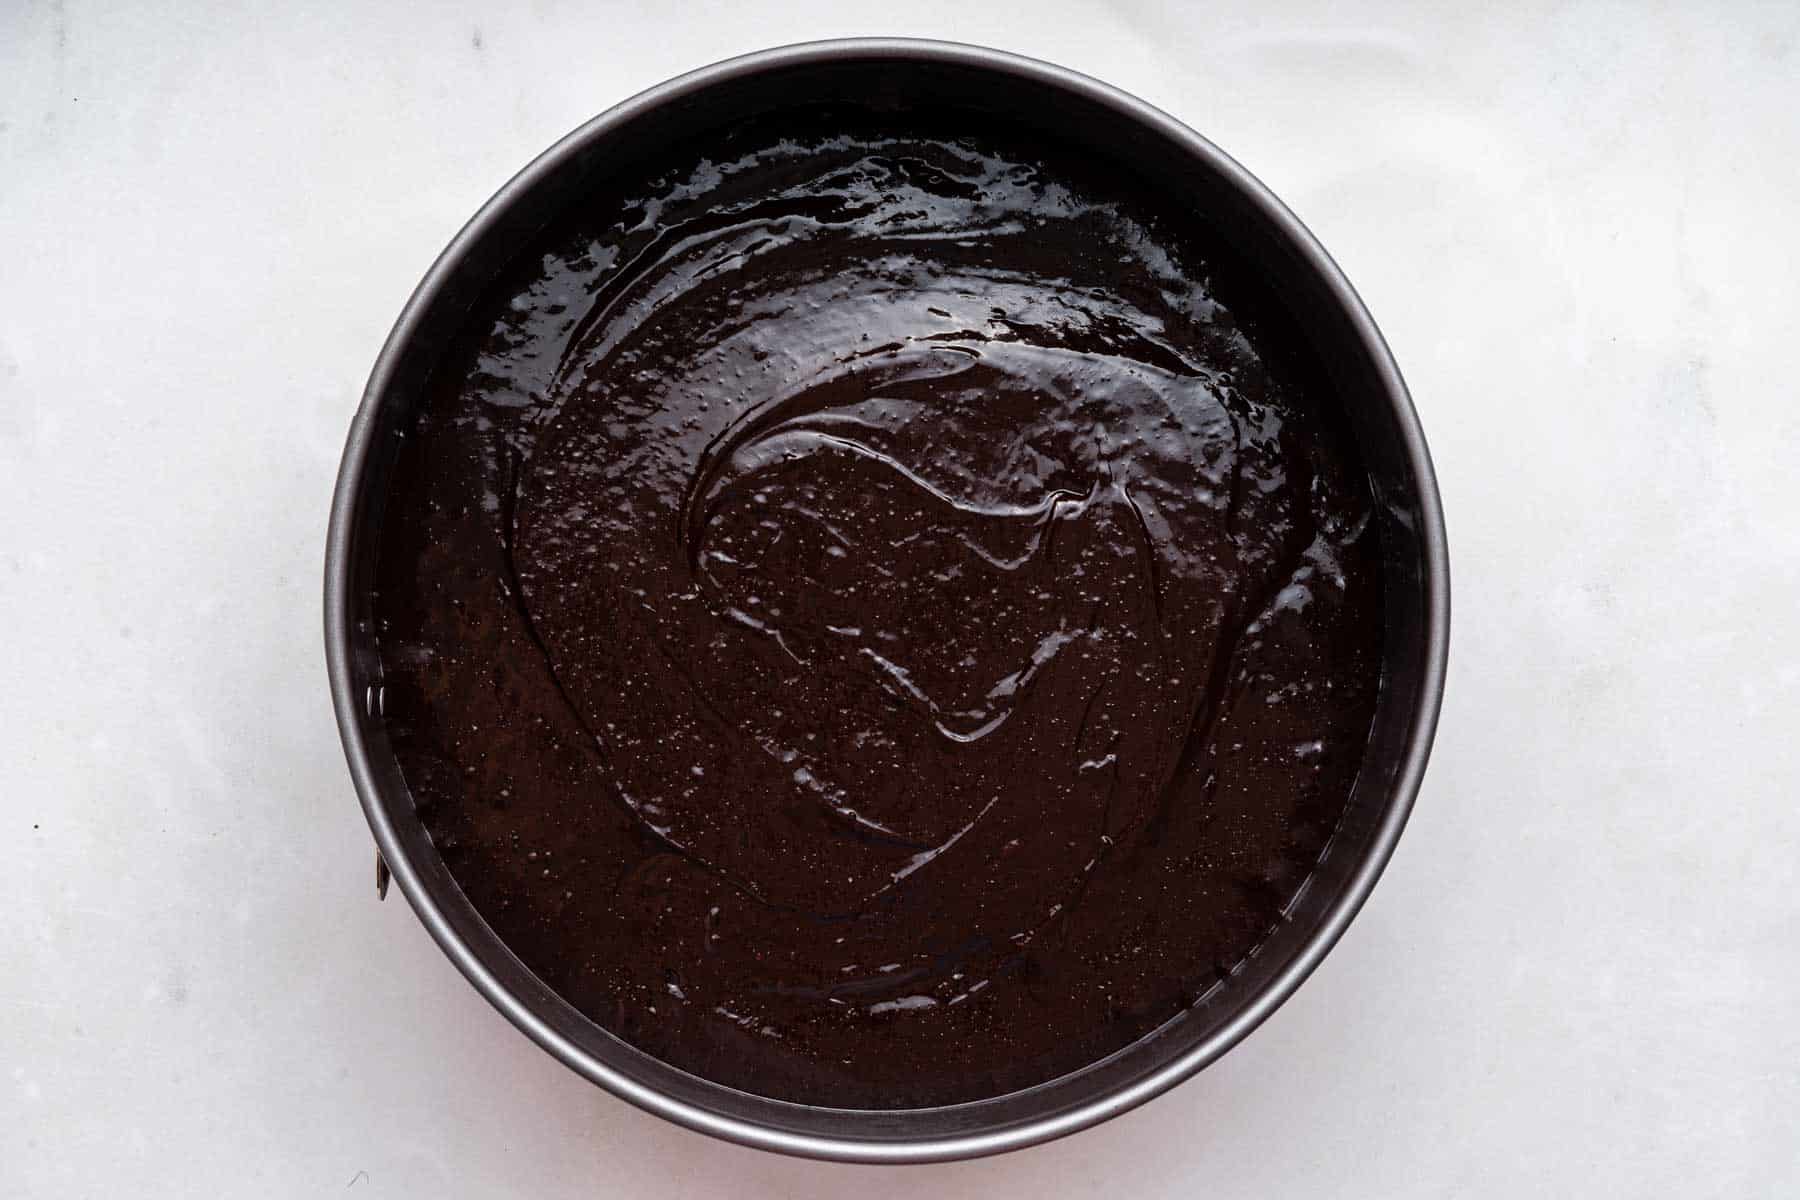
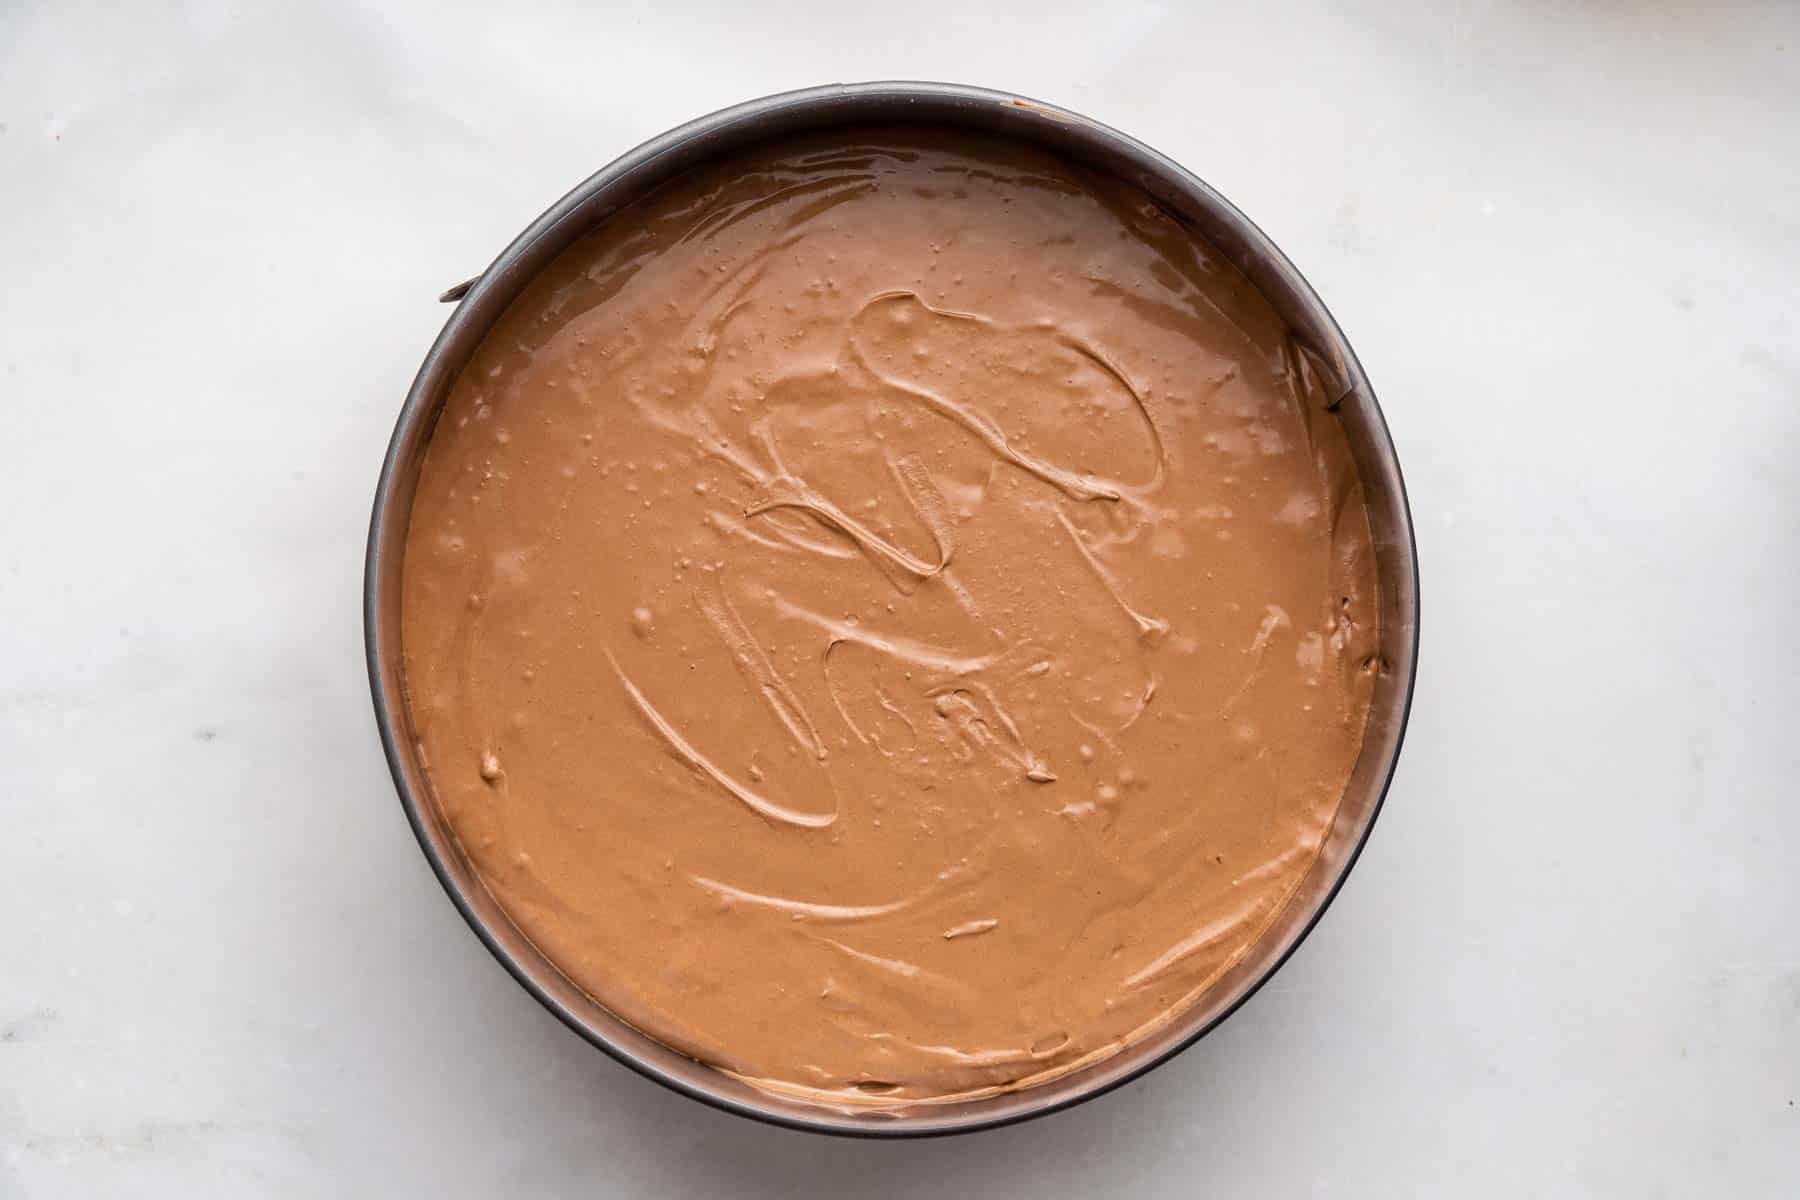
Pour the brownie mixture into the pan, and bake for 29-32 minutes (use a toothpick to test the center to see if it’s done). Let cool completely.
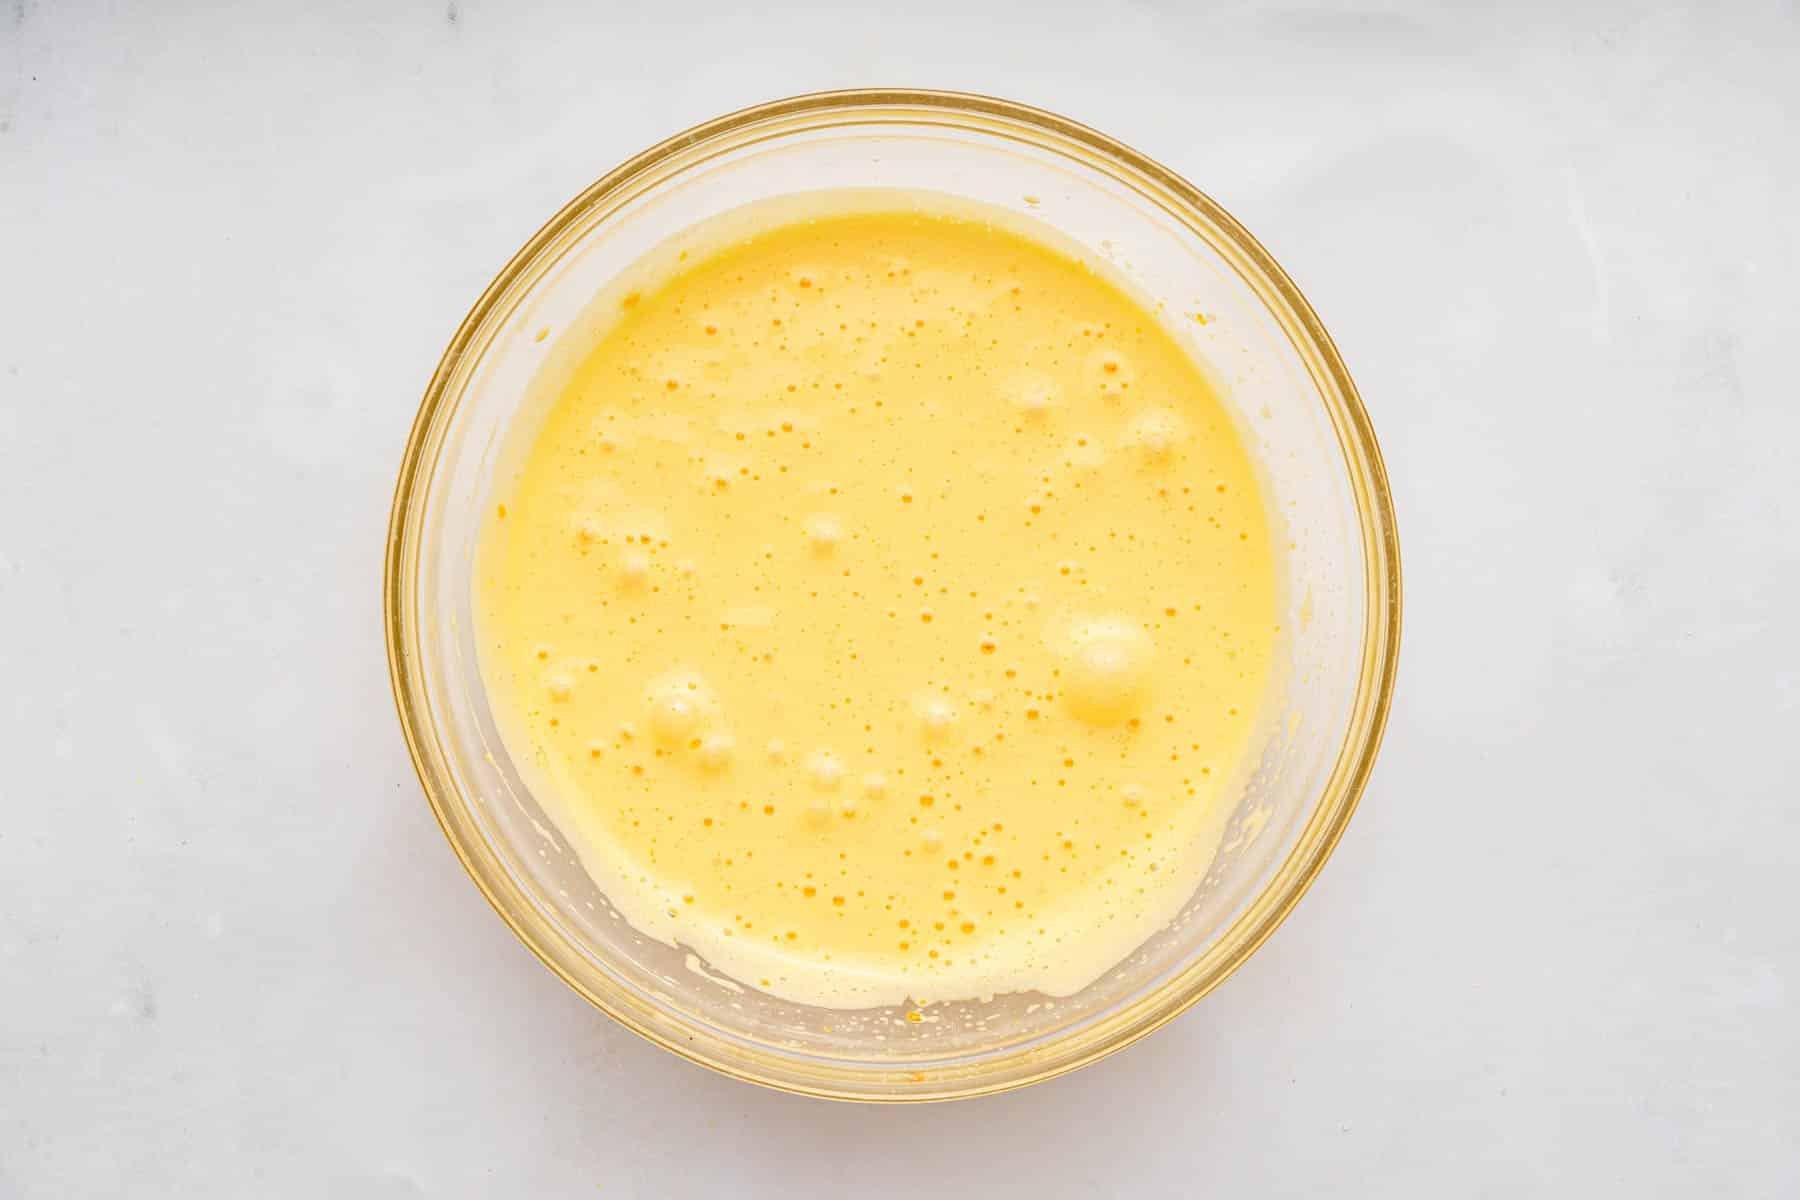
For the mousse layer: beat the eggs with the sugar for about 2-3 minutes, until it’s pale yellow and foamy.
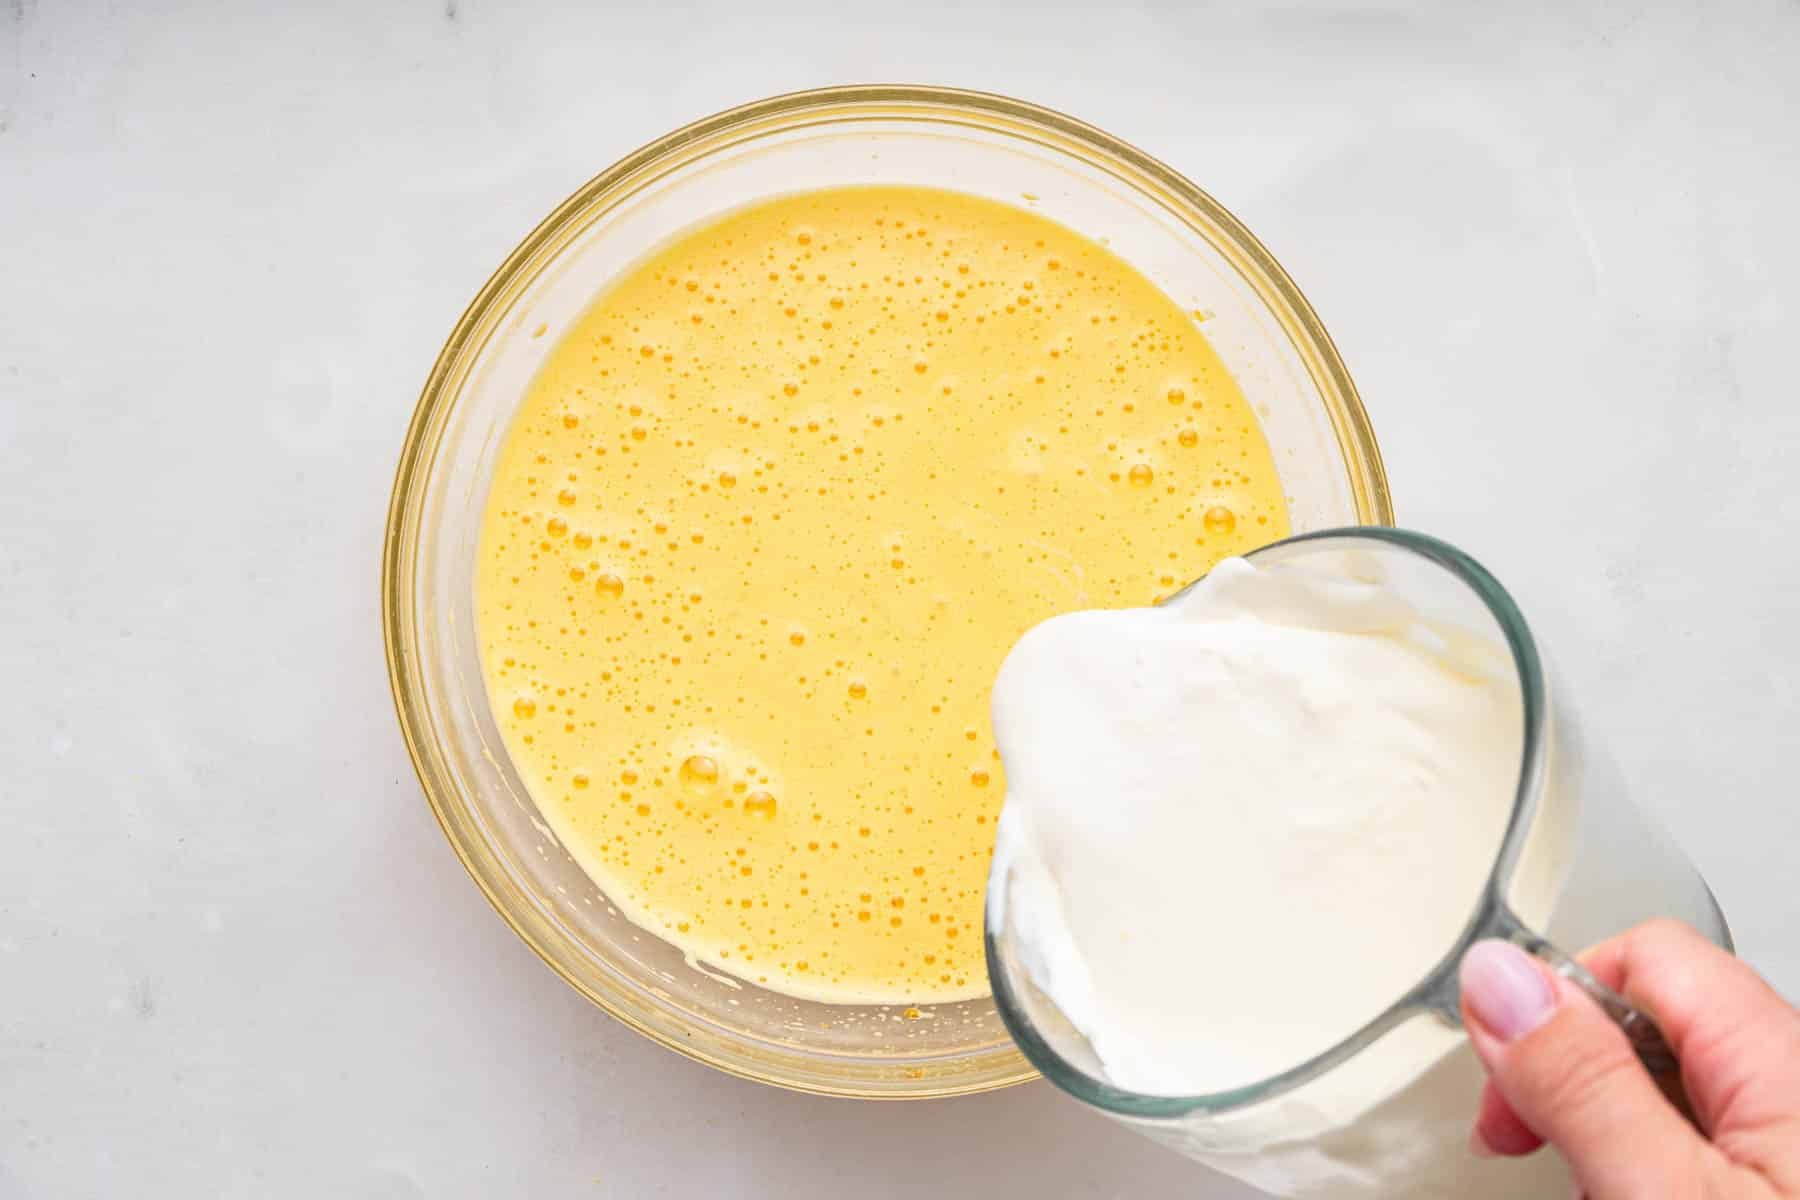
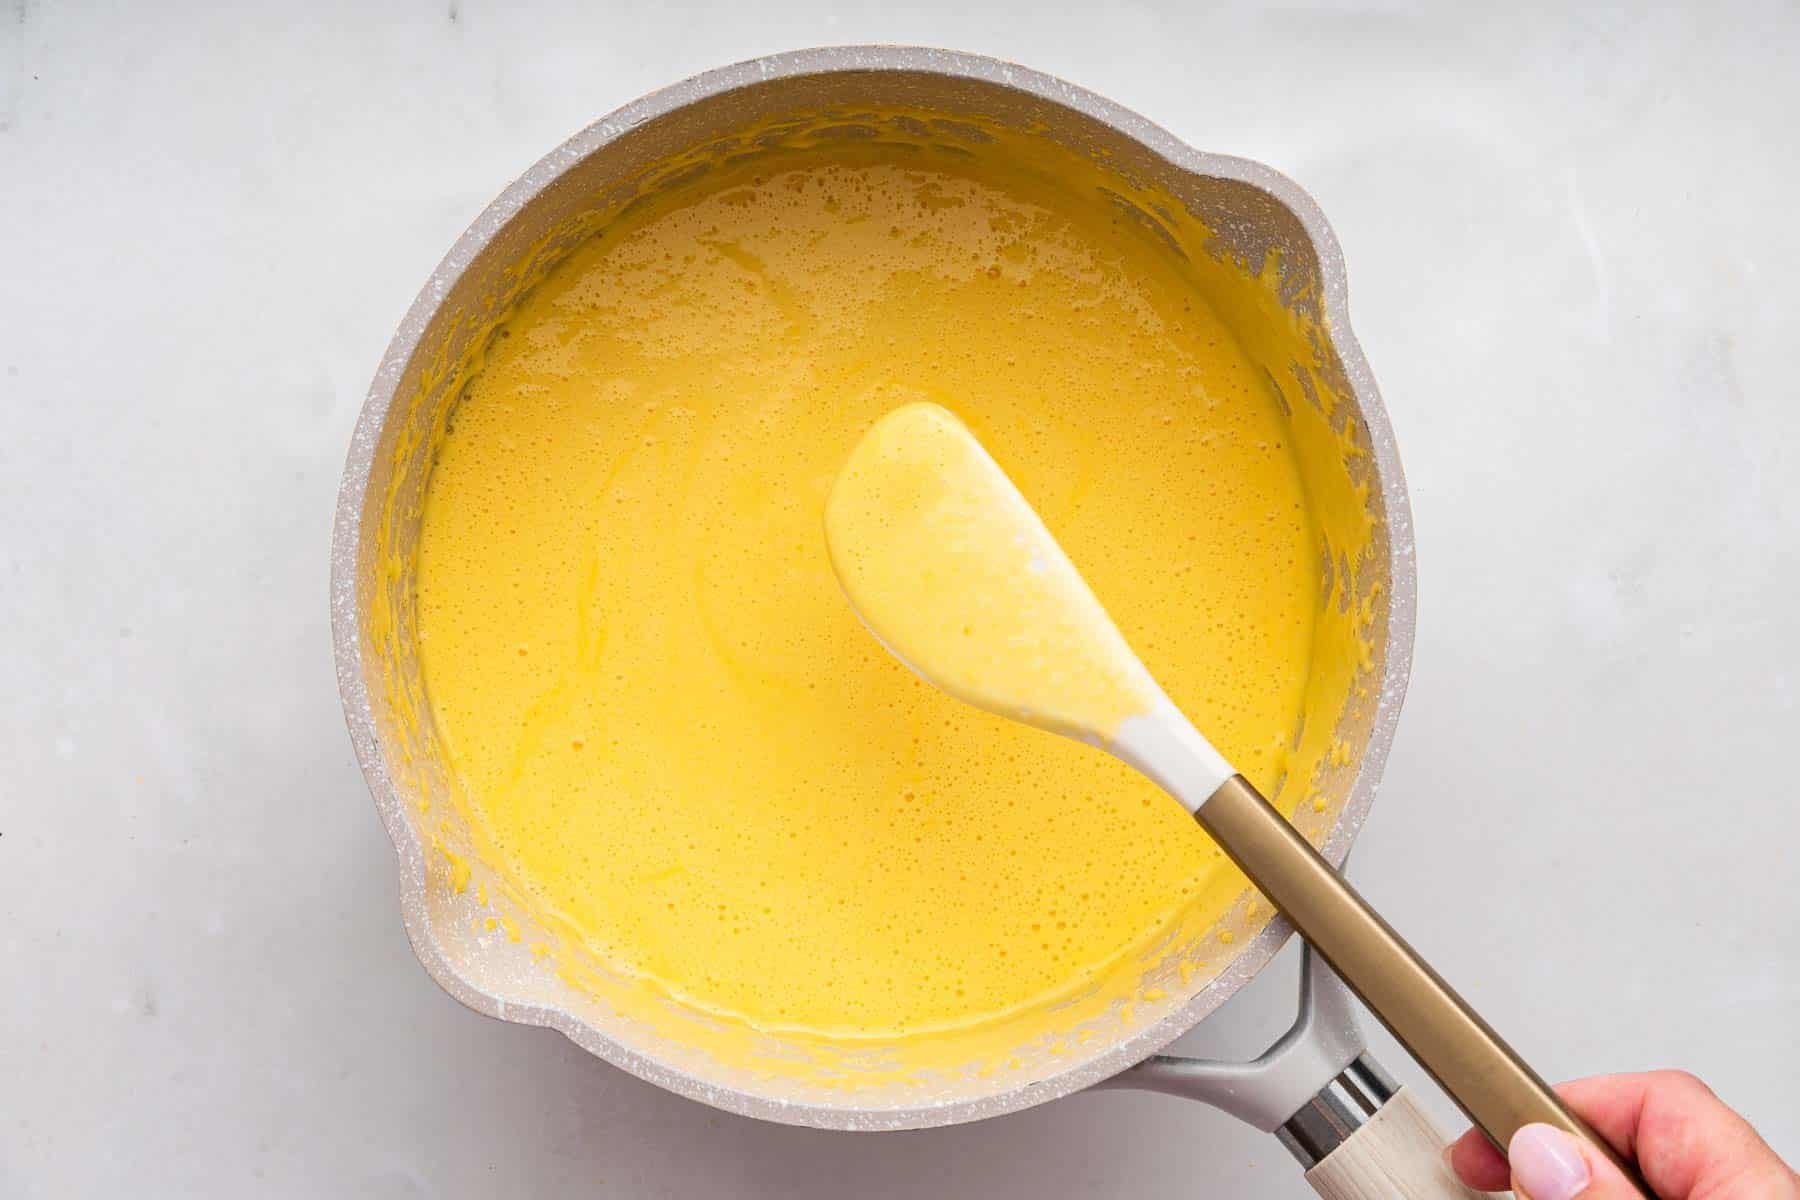
Stir in 1 cup of the heavy cream. Then, pour everything into a heavy-bottomed saucepan.
Turn the heat to medium, and stir the mixture constantly until it thickens and coats the back of a spoon, about 3-4 minutes.
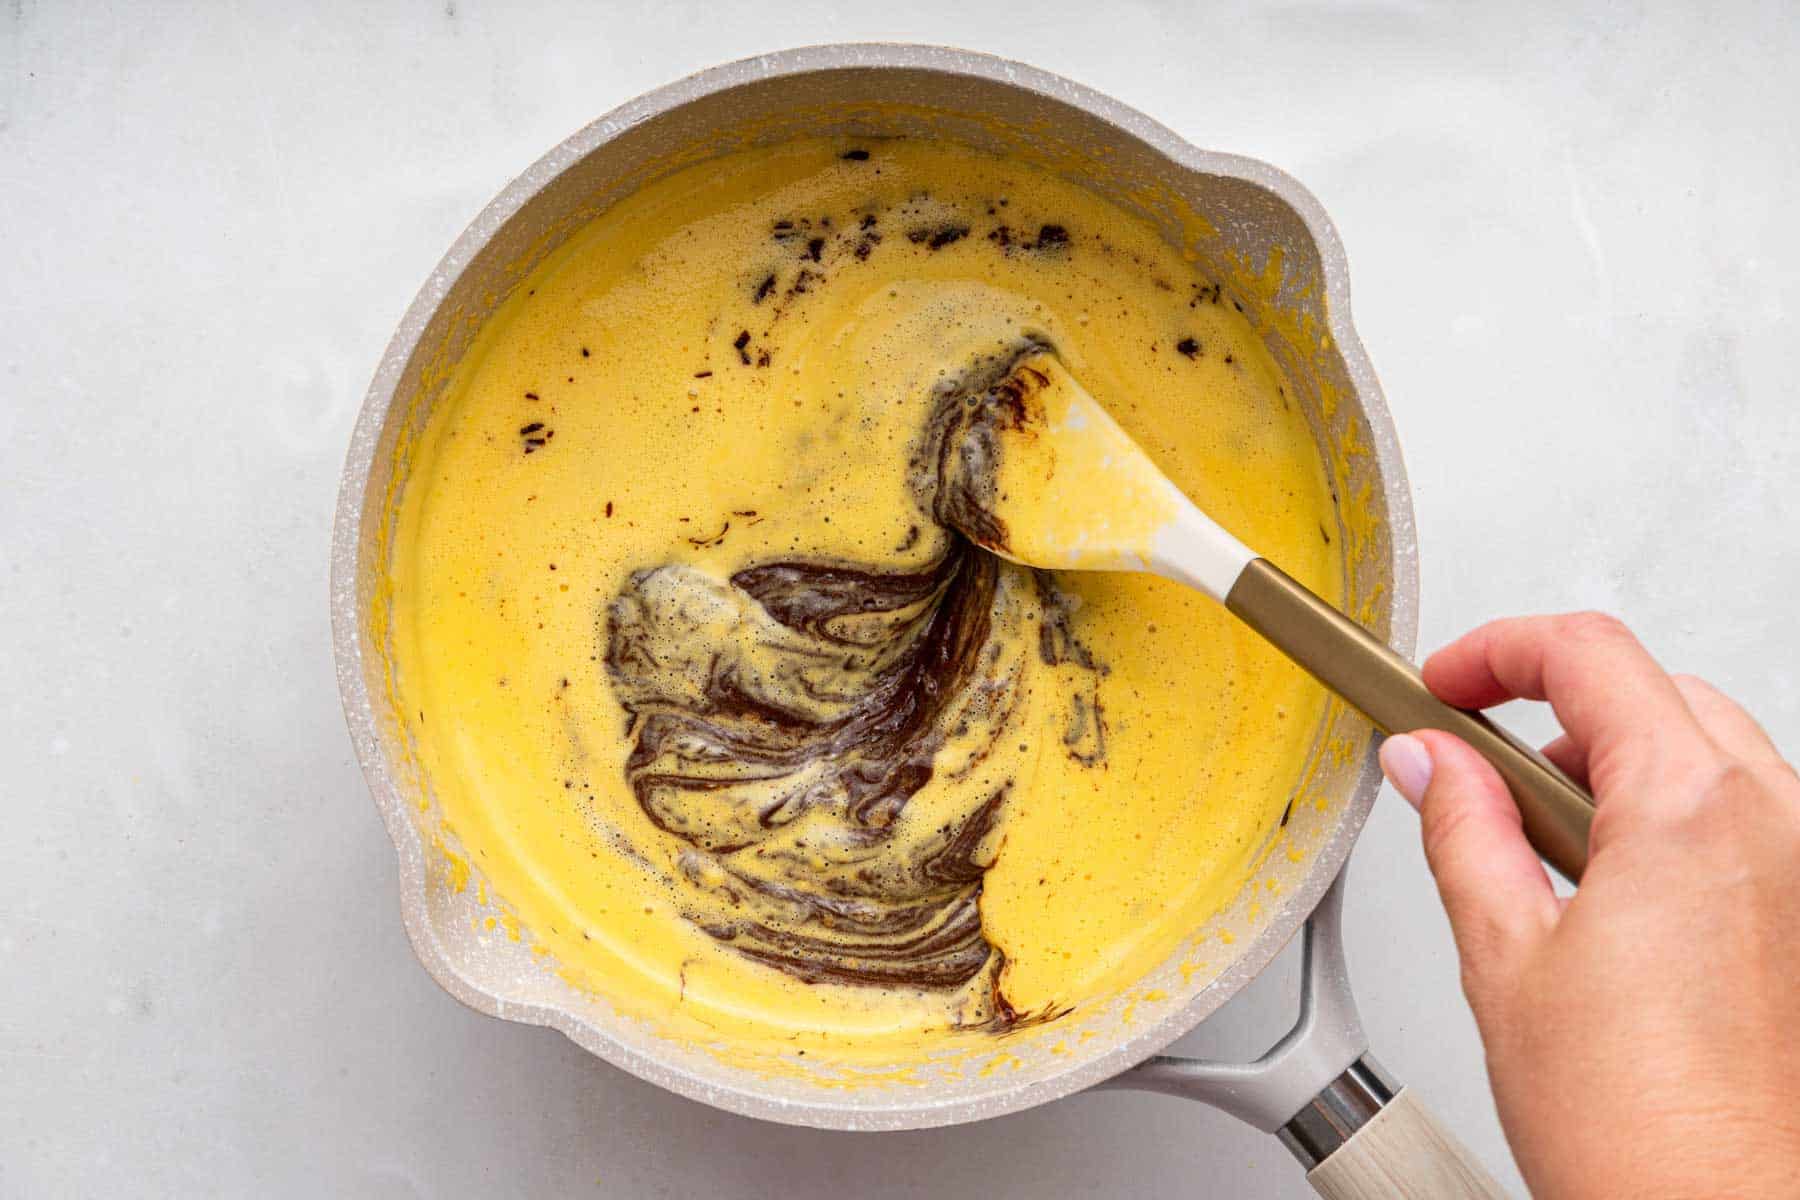
Turn off the heat, and remove the heat from the pan. Add the chopped chocolate to the pan, and cover. Let sit undisturbed for 1 minute. After 1 minute, whisk the chocolate to melt it fully. Move the chocolate mixture to the fridge, and let it rests for 1 hour. it will just start to firm up.
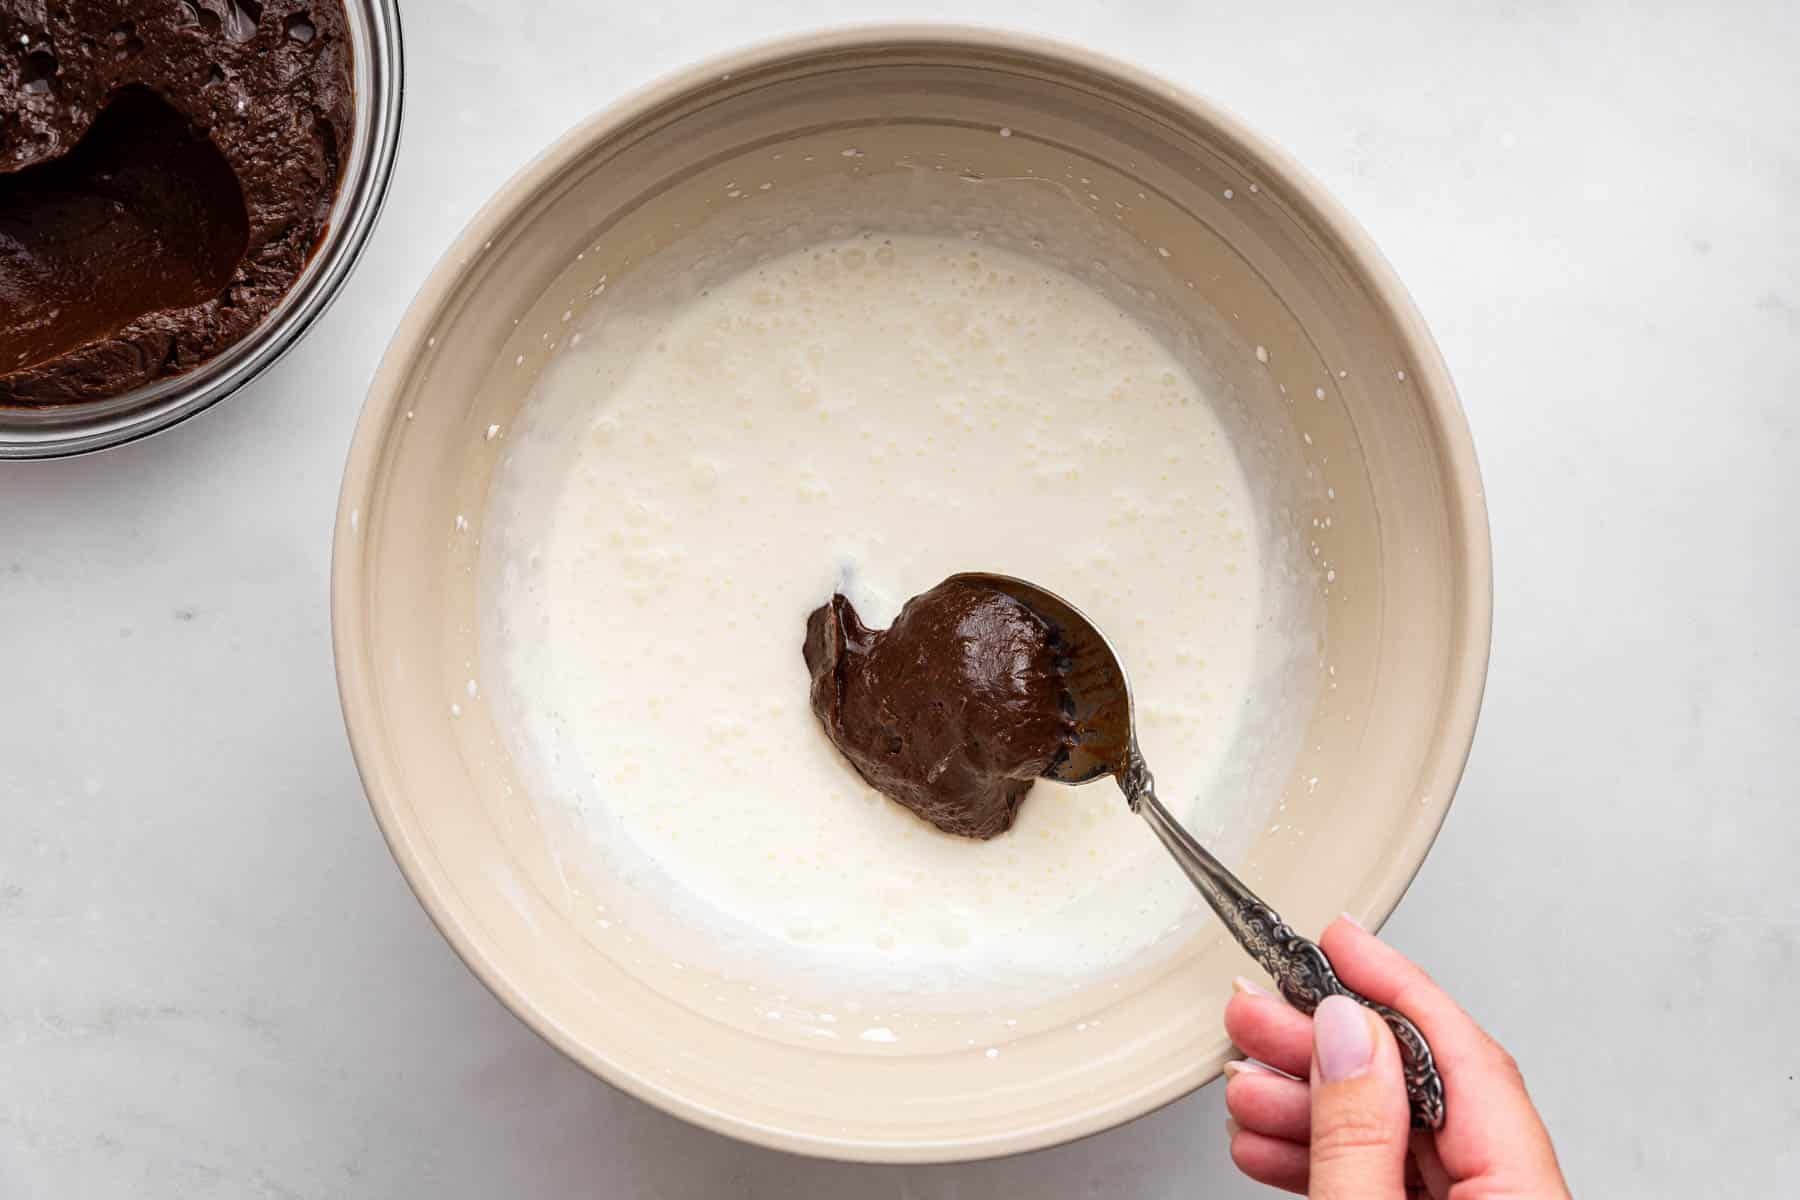
Beat the remaining 1 cup of cream with an electric mixer until soft peaks form. Add small portions of the chocolate mixture while beating until it is all combined.
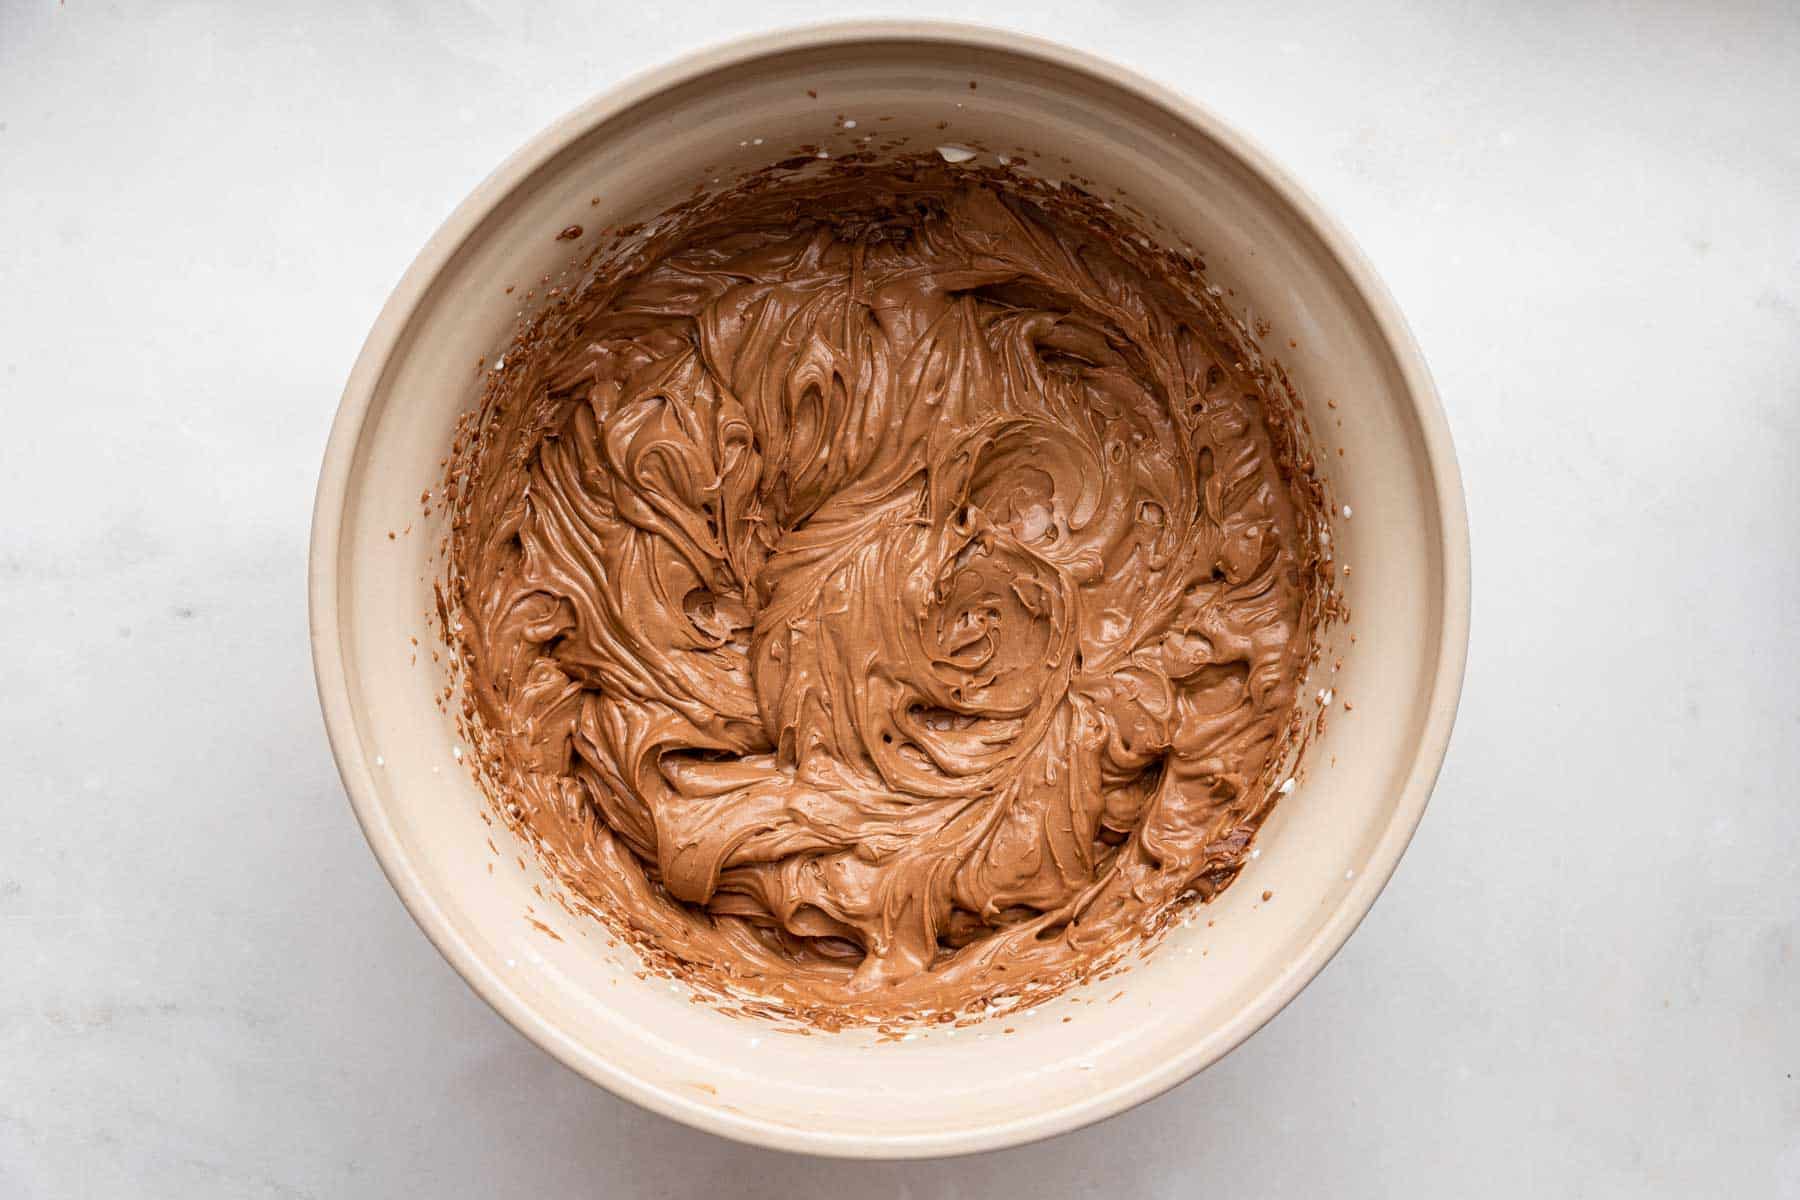
Finally, add the vanilla and beat until combined.
Pour this mousse layer on top of the brownies, and move the entire pan to the fridge to set for at least 4 hours before serving.
Chocolate Mousse Cake Recipe Tips
After baking the brownies in the springform pan, I set them aside to cool. You can do this a day ahead of time, too. My springform pan has 3” sides, but if your pan is a little shorter, it’s fine. My chocolate mousse topping didn’t come all the way to top, so a 2” pan works, too.
I use a springform pan for this chocolate mousse cake for a few reasons. One, it helps shape the mousse into the perfect pile of frosting on the brownie bottom. After a quick chill, just snap the pan open to remove the cake easily. And two, a springform pan is the easiest way to remove a cake from a pan.
But, here’s the deal: this chocolate mousse cake is so delicious, that if you only have my regular cake pan, just use that! The cake might not come out perfectly and look like a perfect slice of cake from a Patisserie, but it will still taste just as delicious! In that case, try dipping your knife in hot water, running it around the edge to release the cake from the pan. From there, I suggest inserting a small spatula and lifting out the cake whole. Alternatively, you can cut a slice first and lift it out before attempting to lift the whole cake.
Let’s eat delicious desserts, regardless of their imperfect appearance, ok? I should be in a help group for my addiction to beautiful desserts.
How to remove a cake from a springform pan:
One tip on removing a cake from a springform pan. Run a knife around the edge of the pan to release the mousse. Place one hand on the bottom of the pan to support the cake while using the other hand to pop open the spring. Then, let the pan fall on your arm (like a bracelet); don’t worry about catching the ring part—worry about the cake!
If you chill the cake before attempting to remove, it helps so much! This chocolate mousse recipe isn’t overly firm or soft, it’s just right. You can pipe it and it will hold its shape, but it will be slightly firmer in the fridge.
One final tip: I don’t recommend chocolate chips for making this mousse because they don’t melt as smoothly as a chocolate bar, but if it’s all you have, it’s fine! You just might have some flecks of chocolate in your final mousse, but it’s still perfectly delicious.
If you’re not up for making the entire chocolate mousse cake, just make the mousse frosting here and serve it in two ramekins with a few raspberries on top.
How to serve this recipe for Mousse Cake
When ready to serve, open the spring on the springform pan, place one hand under the pan and let the rim of the pan fall around your wrist. Move the cake on the bottom layer of the pan to a cutting board to slice and serve.
Storing Mousse Cake
This cake must be stored in the fridge, no exceptions!
For the 6-inch version of this cake, cut it directly in half: 4 tablespoons (60 grams) unsalted butter, 1/2 cup (100 grams) granulated sugar, 1/4 cup + 2 tablespoons (42 grams) unsweetened cocoa powder, 1/4 teaspoon salt, 1/2 teaspoon vanilla extract, 1 large egg, and1/4 cup (30 grams) all-purpose flour for the brownie layer. For the chocolate mousse: 1 large egg, 2 tablespoons (25 grams) granulated sugar, 1 cup (240 mL) cold heavy whipping cream (divided use), 1/2 teaspoon vanilla extract, and
3 ounces chopped semisweet chocolate.
Easy Chocolate Mousse Cake
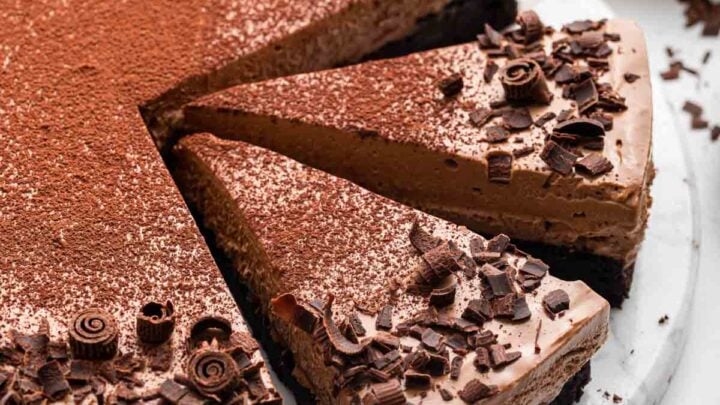
Brownie bottom chocolate mousse cake in a springform pan.
Ingredients
For the brownie cake bottom:
- 8 tablespoons (120 grams) unsalted butter
- 1 cup (200 grams) granulated sugar
- 3/4 cup (84 grams) cocoa powder
- 1/2 teaspoon salt
- 1 teaspoon vanilla extract
- 2 large eggs
- 1/2 cup (60 grams) all-purpose flour
For the chocolate mousse:
- 2 large eggs
- 1/4 cup (50 grams) granulated sugar
- 2 cups (480 mL) cold heavy whipping cream
- 1 teaspoon vanilla extract
- 6 ounces chopped semisweet chocolate (~1 cup, not chocolate chips)
Instructions
- First, preheat the oven to 325, and spray a 9-inch round springform pan with cooking spray.
- Dice the butter into equal pieces, and place in a microwave-safe bowl. Add the granulated
sugar and cocoa powder. Microwave on HIGH for 30 seconds. Stop, stir everything together.
Then, microwave for another 30 seconds. - Carefully remove the bowl from the microwave, and stir in the salt and vanilla. Stir the mixture
for about a minute to cool everything off a bit. - Then, add the eggs, and mix very well until combined.
- Sprinkle the flour on top, and then stir vigorously for at least 50 strokes, using a wooden
spoon. This activates the gluten and makes your brownies chewy! - Scrape the mixture into the springform pan, and bake on a small sheet pan (in case it leaks)
for 29-32 minutes. It’s okay for the brownie to be a bit gooey in the middle. - Let the brownie cool completely. You can also make this a day ahead of time, and store at
room temperature. - Next, make the mousse: with an electric hand mixer, beat the eggs with the sugar for about 2-
3 minutes, until it’s pale yellow and foamy. - Slowly beat in 1/2 of the heavy cream (1 cup), just until combined. Pour this mixture into a
heavy-bottomed saucepan, and place over medium heat. - Stir constantly while the mixture starts to thicken, about 3-4 minutes. However, DO NOT
LET IT BOIL. When the mixture starts to coat the back of a spoon, it’s done. Remove from heat. - Immediately add the chopped chocolate to the pan, and cover the pan with the lid or a plate.
Let sit undisturbed for 1 minute. - Remove the cover, and whisk to dissolve the chocolate fully into the mixture.
- Pour this mixture into a bowl and chill it for about an hour. It will start to firm up.
- About an hour before you want to serve, beat the remaining ½ of cream the cream (1 cup) in
a clean bowl until soft peaks are just starting to form. - Remove the chocolate mixture from the fridge, and break it up into bite-sized pieces.
Begin adding these chocolate mixture pieces to the bowl while beating the cream. After a few
minutes, everything should be homogenous and fluffy. - Add the vanilla extract to the mixture, and beat just to combine.
- Scrape the mousse on top of the brownie in the springform pan and refrigerate for an hour
before serving. - When ready to serve, pop open the springform pan, place one hand under the pan and let
the rim of the pan fall around your arm. Slice and serve. You must store this cake in the fridge.
Notes
Nutrition Information:
Yield:
8Serving Size:
1Amount Per Serving: Calories: 299Total Fat: 23gSaturated Fat: 14gTrans Fat: 1gUnsaturated Fat: 8gCholesterol: 132mgSodium: 264mgCarbohydrates: 21gFiber: 1gSugar: 13gProtein: 5g


So delicious!! The supermarket was out of cocoa powder so I used the same amount of melted chocolate. I also mixed chocolate chunks into the brownie mixture. Spot on. Thanks for the recipe, I will definitely make it again.
This was disappointing! The brownie section at the bottom was hard and hard to cut through, however the mousse was nice. The overall dish was very rich, way too rich for normal human consumption.
Define normal human consumption. I feel judged because I have personally devoured this cake within 2 days with my husband.
My guess is the brownie part was overbooked.
I think this comment is a bit harsh. It may be too much for you, but others may like it, perhaps you should check the ingredients first to see how rich you think it may be.. I personally love Christina’s recipes and sometimes they don’t turn out how they should but that it probably down to the person baking rather than the instructions.
Hi. I have tried few of the cakes and i love it as it is easy to prepare and just for two!
I am planning to bake 9 inch chocolate mousse cake for my husband birthday.
Should i double the recipe of 6 inch cake?
Yes, double :)
I’m curious as to whether the mousse holds its shape once you’ve released the springform pan. Assuming of course, that it’s been in the fridge for awhile to set. But for presentation and keeping after the first serving, can it come out of the pan and not drool everywhere?
Yes, as long as it has set in the refrigerator. Obviously, after it sits out for a few hours, it will become slightly soft, but it will stay firm after slicing. Promise :)
Thank you! It’s in the fridge now!
I successfully made mousse from scratch for the first time thanks to this recipe! 2 questions. Can leftovers be portioned and frozen? Wondering if anyone has tried that!
I would LOVE to have a slice of it in a month or two! I have too much rich food around at the moment!
Also, technical wuestion; my mousse got ever so slightly grainy. Is overhopping the whipped cream or a blip in the chocolate melting more likely to blame? Or perhaps my chocolate needed tempering? (it was a little chalky!)
I just made this for our pandemic anniversary dinner’s dessert. 2nd year in a row at home. I couldn’t find my springform pan so I used a 6″ pan instead. Also, I am gluten free so I used almond meal in place of the a.p. flour. It was perfect. My only sorta complaint is that I thought the mousse wasn’t intense enough in its chocolate flavor. But my husband was happy, and that’s what I wanted. Thank you. It was easy and fun to make.
I have a timing question. It says about an hour before serving to finish the mousse and add to the cake, then refrigerate and serve an hour later. This will be a dinner party. Can I do it all a little earlier? Can it sit longer in the fridge waiting to be served?
Thanks! It looks DELISH! I can’t wait to try it.
Yes, absolutely, it can sit in the fridge for longer. If it’s too cold, let it rest at room temp for 15-20 minutes while you make coffee to serve with dessert at your party :)
Awesome! Thank you, Christina.
It turned out very well, Christina! I posted a picture on Instagram. It was a perfect dessert, Definitely a winner for chocoholics! A+ from me to you!
I finally got around to trying this recipe, and now I’m kicking myself for waiting so long. It was delicious, and the perfect size for three people twice.
Eleven out of ten for the recipe. Lots of steps, but all of them are easy and clearly explained.
My only “issue” if you want to call it that is the day between first cutting and second serving, living in the fridge without the springform pan protection.. I think next time I’ll serve it in individual ramekins ala trifle instead of in cake form.
Thanks for this wonderful recipe. I’m sure it will become a birthday favorite.
Thanks, Zilla :) 11/10 makes me so happy! Next time, if you sprinkle some unflavored gelatin powder in the mousse (before beating), it can hold its shape leftover. Thanks for writing :)
I’m a bit confused with the timing in the recipe. I’d like to make this in the morning and serve later in the evening. Can I do everything up to and including step 12. (When you put the egg chocolate mixture in the fridge for 1 hour. And then as long as I make sure that sits in the fridge for 1 hour to chill can I complete the final steps to make the dish complete – and leave it in the fridge completely made for 8 hours? Or do you HAVE to do the final steps only 1 hour before serving?
Ok, to make it an entire day ahead, make the entire recipe and chill it. The mousse will be fine to sit longer in the fridge. If it seems too firm when it comes out of the fridge, let it rest at room temp for 20 minutes before cutting.
I loved this recipe…I added a layer of vanilla mousse to cut some of the richness.. perfect!!! I was going to post picture but couldn’t. Thank you for these amazing recipes for 2.